

 Reply With Quote
Good writeup. The 90deg fitting there is probably not the most efficient but as you say, may as well use what you have left over
When are you racing it?


NOTE: If you do not feel comfortable doing this project, leave it up to the pros. I hold no responsibility for any issues that may arise due to this How-To.
Costs: $145 Intercooler
$5 Hose Clamps
$36 90 degree silicon bend
$6 Mounting brackets
Total Cost
$192
I used the stock Aristo and some old soarer cooler piping I found from previous projects to reduce costs and for ease of fitment. I found that I still needed to purchase a 90 degree bend, for which everyone wanted to charge about $100. Found one on Ebay for $36 to my door, thanks Ebay!
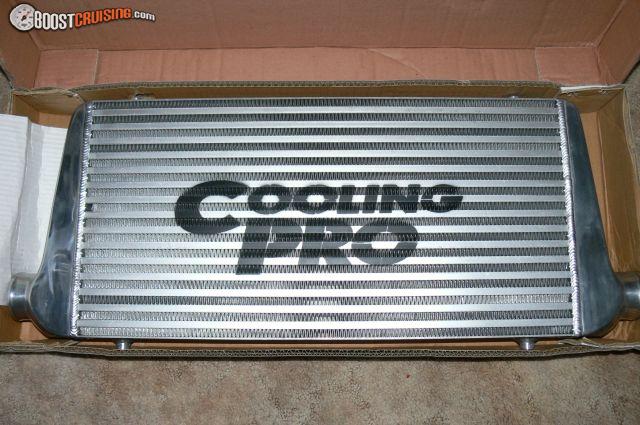
Step 1. Purchase the Intercooler and bend/s (if you plan to use the stock piping, get a 2.5inch inlet and outlet cooler)
Here is where I got my 600x300x76 bar and plate cooler from, though there are plenty to choose from all over Ebay.
=> http://cgi.ebay.com.au/ws/eBayISAPI....1441&rd=1&rd=1
And here is where I got the bend
=> http://cgi.ebay.com.au/ws/eBayISAPI....4858&rd=1&rd=1
Step 2. Disconnect the Battery
This will serve 2 purposes, A) ensures no wires can short while you remove the front bar, and B) gives your ECU a reset, ready for the new intercooler.
Step 3. Remove Front Bar.
I have an aftermarket bar, so it was fairly easy to remove. Remove all the bolts, and pull her off. NOTE: please make sure you disconnect any fog light wires before yanking her off.
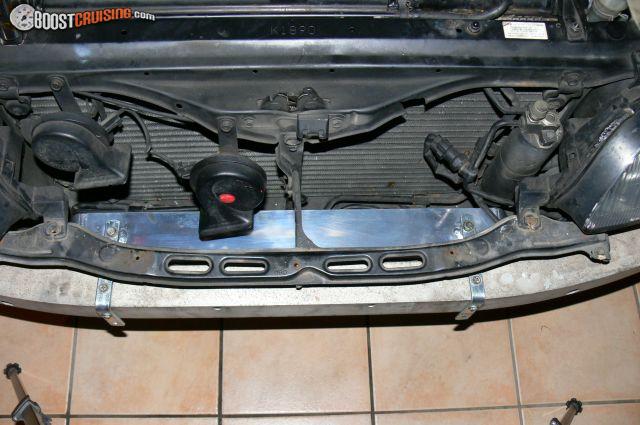
Step 4. Remove stock IC.
There are 3 main bolts holding it on to the car via brackets and 2 cooler pipes. Remove the pipes 1st, then remove the air inlet shroud, then the mount bolts.
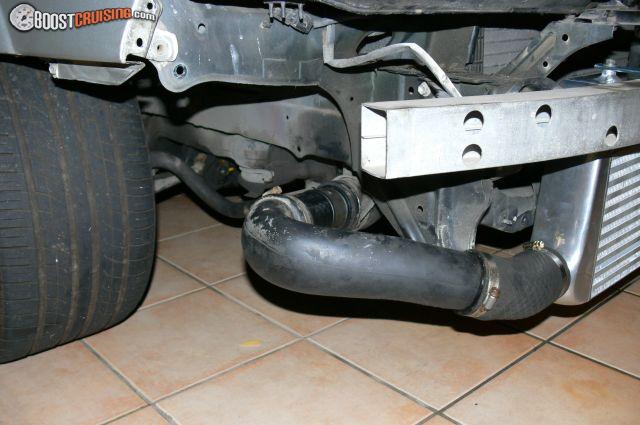
Step 5. Remove the front IC pipe.
To remove the long piece of pipe, you will need to remove the intrusion bar. 5x 12mm bolts hold this on and you can access them via the holes at the front with a socket and extension. You will also find a small AC sensor mounted on the bar, pull it off and mount it elsewhere. Once the bar is off, disconnect the passenger side IC pipe connection and pull the pipe out.
Step 6. Adjust steering and air-con pipes and move radiator fan cooler.
My radiator fan cooler was already removed in another project, but you may need to move the pipes towards the condenser as well as the power-steering cooler lines. I got away with bending the pipes very gently towards the condenser.
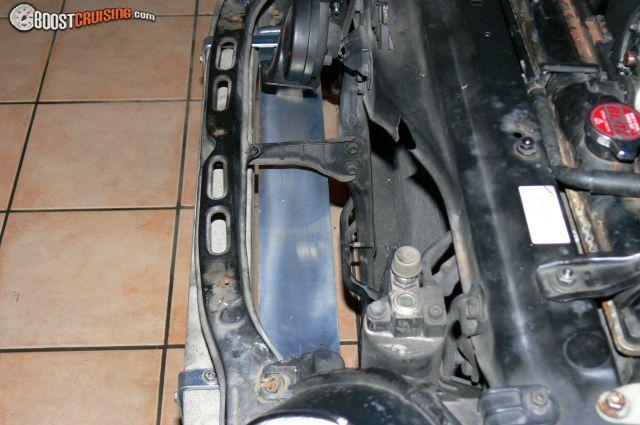
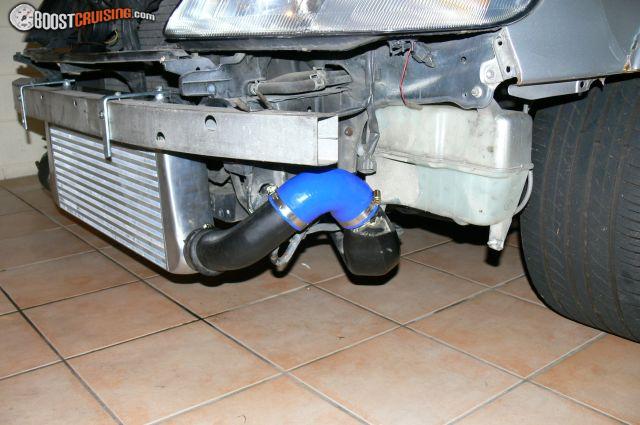
Step 7. Mount the Cooler.
I purchase simple 90 degree brackets from Mitre 10 for about $3 each. More than ample to hold an IC onto the front intrusion bar. Dummy fit the IC, measure up the distances to be sure its in the middle of the front. Bolt the brackets onto the IC, and hang the brackets over the re-installed intrusion bar. Once thats done, screw in some big screws through the front and top of the brackets into the bar. This will give added strength. While at this stage, its best to check for the front bars clearance, so dummy fit it onto the car to see if you have to hack it up. With any luck you wont, but if you do, grab the good old jig-saw and hack away! It might also pay to check for ground clearance and make sure the cooler is not sitting too low.
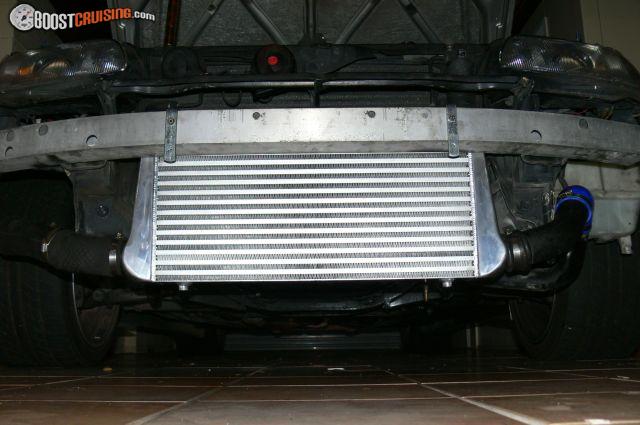
Step 8. Install the piping.
Because Im a cheap skate, I used old intercooler parts from my old soarer as well as cutting up the huge front stock Aristo IC pipe. As seen in the pics, I just moved the stock pipes around, cut up the long pipe to suit some bends and join them all together. I found I also needed a 90 degree silicon bend, so Ebay solved that problem. Make sure you tighten all the hose clamps up to make the joints air tight and secure.
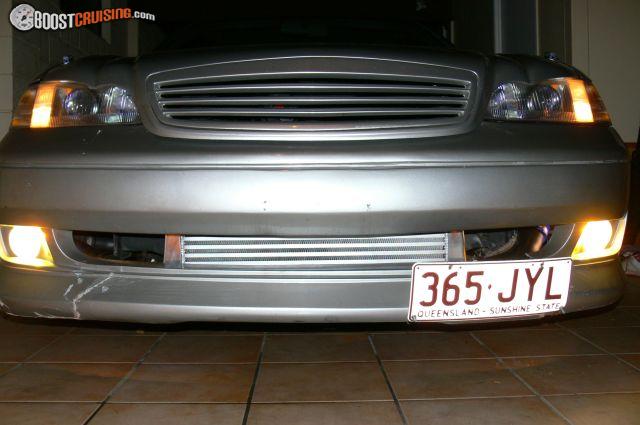
Step 9. Stand Back and enjoy the view.
Almost done, now take some pics to show your grandkids, and get ready for the last few steps.
Step 10. Start her up.
Connect the battery up, making sure any wires are not going to short. Start the car and listen for any leaks. It will make a pretty obvious vacuum noise if theres a leak, so if you find one, turn her off and fix it.
Step 10. Reinstallation.
Re-install the front bar making sure to connect all the wires back up and all bolts are tightened securely.
Step 11. Enjoy!

Good writeup. The 90deg fitting there is probably not the most efficient but as you say, may as well use what you have left over
When are you racing it?
QUICKEST 1JZ'S IN OZOriginally Posted by MR 1JZ

racing? nah.... I challenge anyone to race a +1700kg car and not break something in the processI can think of the diff screaming abuse within the 1st few races, lol...
Ive almost finished all the mods im going to do to this car. It will become the wife mobile in a few years when i can find a +98 VVTI TT Supra GZ 6speed for a decent price
The aristo is primarily a cruiser with heaps of torque on the h'way, but she lacks down low. Especially now with the cooler and the ETTC mod. Full boost hits at around 4500rpm, which is great for the mrs and for saving fuel, but not really good for off the line launches.
I'll be leaving it with the exhaust, cooler, pod + cold air intake, and the HKS f-con. It'll do as a family cruiser very nicely
Whens yours coming?
 Posting Permissions
Bookmarks