
 Reply With Quote
Thanks very much Ed
what kind of transparency stuff did you use to print it out on? just normal? what kind of printer?


Stewy suggested that this little trick i pulled on the dash in my supra might actually be useful to other people! lol... so heres a quick heads up on the new guage face i made, and basically how i did it.
so basically this is a cheap ass way of customising your dash, or as in my case, adapting your dash to accomodate a non OEM instrument grafted into the cluster housing. someone also suggested it could also be the lazy mans way of recalibrating a speedo after a diff or gearbox change etc.
When i first wanted to fit a mega RPM tach into the dash, i thought id probably need someone from a printing company to make the gauge face i wanted. however after contacting a few, including sticker designers/makers, laser cut decals, blah blah, the crunch was that making the gauge face was very difficult at the resolutions required, and the transparency required was going to end up being an issue. they decided, generally speaking, that it could not be done.
SO, semi defeated i decided to go macguyver on the project...
nuts and bolts of it are:
- get your original gauge face out of the cluster and stick it into a high res scanner
dont resize the image etc, as scanners do a pretty damn fine job of keeping the dimensions correct, and when it comes to printing later, wont require hit and miss rescaling.- take said scanned image of guage face, and 'clean up' in photoshop or illustrator or whatever you want. make the black perfectly black. remove dust and crap, make the numbers bright white, and make your reds blood read. keep the edges clean, and make the image as crisp as possible generally.
- obviously at the same time as all of this, design in your modifications. for eg, increase the RPM range of the guage, or the size of the needle sweep, or compress the markings 10% to match your new diff ratio, or whatever. its fiddly, but very doable.
- if using an entirely new instrument, i found it handy to scan in that instrument's gauge face so i knew Id get the calibration of my changes to the original face correct.
- next test print on paper, and check out it all lines up, and the sweep/calibrations/markings are where you want it
- so, the next bit requires taking your image in photoshop, and 'flipping it' horizontally (so that the numbers etc all read back the front)... why? cause of the next point...
- print that flipped image onto a good quality overhead transparency sheet. absolutely MAX OUT your printer's settings to make sure there's an assload of ink delivered onto the overhead. you want your black to look black when backlit by the cluster, yes?
- now let the damn thing dry for 5 mins or so, then take a look at it. the printed surface looks good, yes, and backwards. flip it over... oh yeah baby! rich rich deep colour with a nice, smooth, homogeneous sheen to it
- next, take overhead printout, and get yourself a plain while plastic manilla folder, or other paper organiser type plastic folder. the ones with thin, plain white plastic covers.
- with superglue applied to the printed side of your new guage face (dont go spastic, i just used one light ring of glue in a circle around the middle where the needle goes, and one around further out the perimeter. i used superglue, and it didnt seem to fuck the ink at all. and the usual white superglue frosting didnt come through either.
- so, allow to dry, and then cut out to the exact shape of your original gauge face. i then used a 3m thin double sided tape (similar to the oem tape) to stick the face back into the instrument cluster
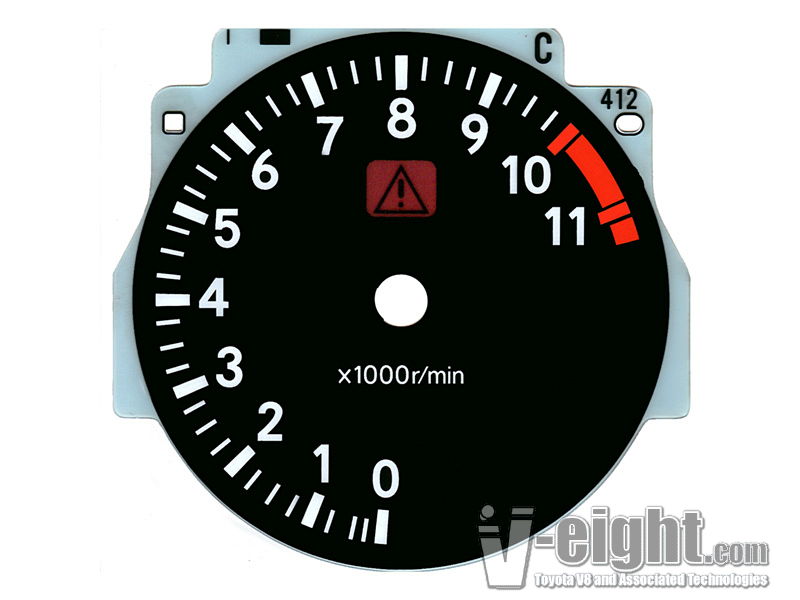
pic 1 - this is the post photoshop digital image of my new tacho face
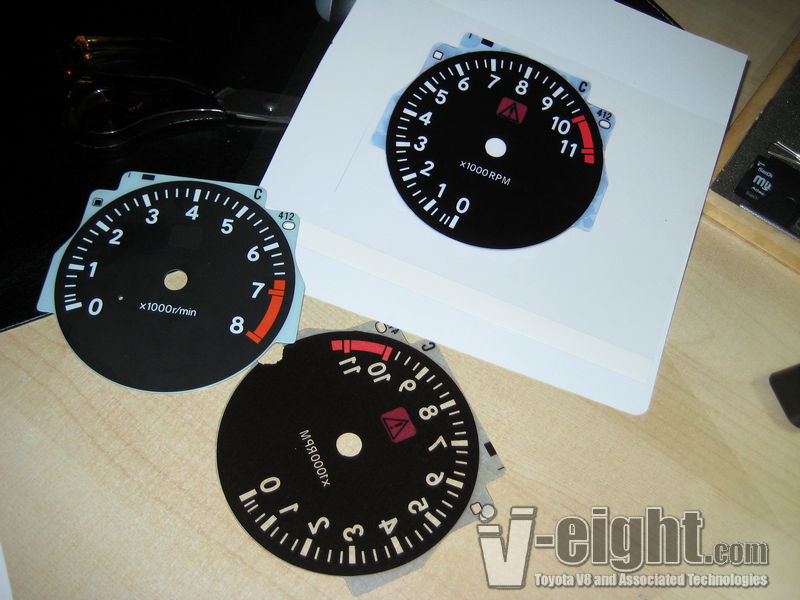
pic 2 - the original face, and 2 printouts of my new gauge face, one laying on the table the way it prints out (ie reveresed) and one affixed to the thin white plastic sheet from a manilla folder
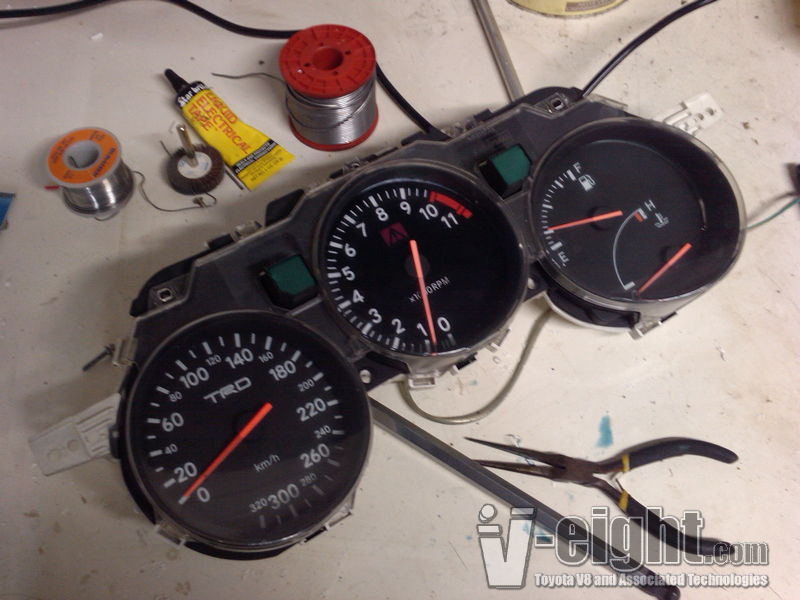
pic 3 - assembled back into the original cluster
enjoy! cheers
ed
../delete/ban
tech moderator
E46 M3 Nürburgring Nordschleife - 8.38
Thanks very much Ed
what kind of transparency stuff did you use to print it out on? just normal? what kind of printer?
"I'm a Teaspoon, not a mechanic"
"There is hardly anything in the world that a man can not make a little worse and sell a little cheaper" - John Ruskin (1819 - 1900)
AU$TRALIA... come and stay and PAY and PAY!!! The moral high horse of the world!
nothing that i can remember, bit i do know its not the cheapest stuff. i got it from officeworks in a pack of 10 sheets. has a 'print this side only' side, and is pretty robust looking stuff.
the printer is just an epson bubblejet, that can do photo resolution printing. dont know the exact DPI off the top of my head, but we maxed out the setting and colour saturation etc.
we did prob about 4 prints with different settings before getting the balance right, maximal ink vs blurring/smearing of the image. it wasnt that hard
cheers
ed
../delete/ban
tech moderator
E46 M3 Nürburgring Nordschleife - 8.38
Nice write up ed!Looks awesome! You should go show those signwriters who said it couldn't be done. haha
Just wondering if you tried the new gauge at night? Does it light up the same as the original gauges?
There is a pattern printed on the back of the original gauge face to even out the illumination. Back in the day when I put fully sick LED's in the cluster of my Celica I sanded that pattern off the back of the gauge faces to let more of the light through and even up the illumination.
If you're using the stock incandescent globes in your cluster, you could sand the front of the original gauge face so that it was clear and then glue the transparency to this instead of the plain white card, that way the illumination would be the same as it was originally?
Its probably not even an issue, just thinking out loud... procrastinating to get out of exam study.

am i missing something? did you have a 11k trd tacho to start with?
or is the 11k one the one you made?
if 11k is the one you made the tach pointer wouldnt line up correctly??
actually looking at the fitted pic the needle sits on 1k is that right?
sorry after reading again i have just worked out you tricked people...
did you do the same with the speedo or is that genuine trd?
Glenn
Current Ride http://www.toymods.net/forums/showthread.php?t=41123
Previous 3SGTE ST162, 1JZ Cressida 215RWKW-ET 13.318, Celsior, XT forester, 3SGE KE70.
Originally Posted by NME308

Its not the standard tacho in there. Dare say its an Autometer one or similar.
-Chris | Garage takai - Breaking cars since 1998
Sparky - AE86 IPRA Racer | RZN149 Hilux - Parts and Car Hauler
I never saw a wild thing sorry for itself. A small bird will drop frozen dead from a bough without ever having felt sorry for itself. - D.H.Lawrence
tricked people? wha?
dummy assembly in pics above, needle not fitted back into the shaft properly
takai is correct - cheapo chinese tach instrument retrofitted into the cluster
and yerp, thats a real trd speedo
../delete/ban
tech moderator
E46 M3 Nürburgring Nordschleife - 8.38
excellent, thanks heaps mate. this is the sort of thing i love- making modifications look factory and subtle.
will be doing this on my benz.
was economy gauge, now "kompressor" gauge
Thought I'd give this a go myself...
I will upload the editable Illustrator file (.ai) tonight for anyone who's keen, which will not only print 1:1 scale, but you can change the background colour, edit the fonts, move the redline point, etc. (I used Eurostile Bold font, so I'll try and upload that also as it's required.)
TA23, RA23, RA28, RA35 Guages (redline to suit my requirements, not factory)

Nice work Ed. Let us know how this goes over time. I have seen a few people attempt this with inkjet printers and in all cases I saw it faded over a relatively short time. It's heat and sunlight exposure that does it.
I would suggest a toner printer with sheets of translucent paper that wont get burned by the drum, that might last longer but I've yet to test it.
It's something I've been trying to do for a long time.
Oh and reps for resiting the urge to rice it up.
"In the beginning, the universe was created. This has made a lot of people angry and has widely been regarded as a bad move." -HHGG
Yea, a colour laser printer would print epic colours and you can get transparencies for them.
Also, re, the light mask pattern on the back for even light dispersal, all you have to do is scan the back of the stock face and print that out too, so you have 3 layers (face graphic, white plastic diffuser, light mask) or whatever to replicate the stock setup.
 Posting Permissions
Bookmarks